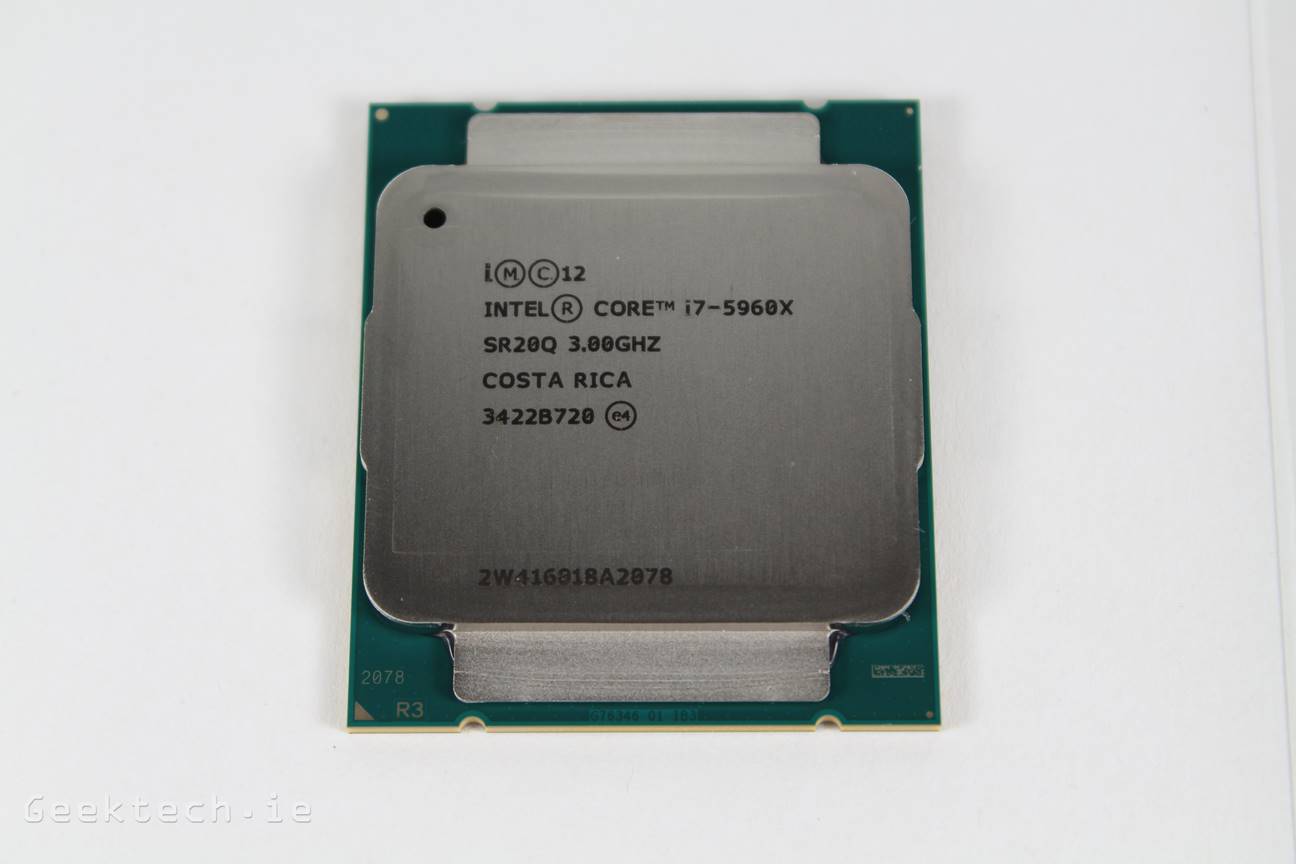
The Intel Core I7 5960X
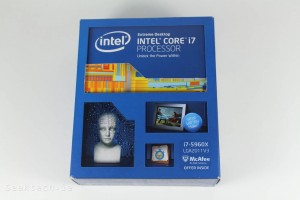
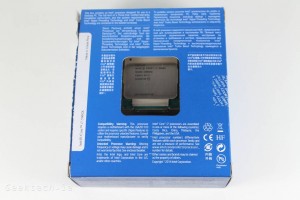
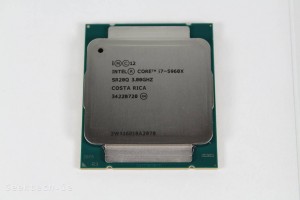
The €1,000 CPU comes in basic boxing standards from Intel. Simple cardboard sits between open world and the 8 core mammoth CPU.
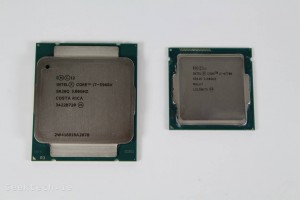
An easy way to tell the difference between the new Haswell-E vs standard Haswell is a straight up size comparison. It’s obvious to tell which is which, but just in case you missed it, the giant CPU on the left is Intel’s latest Haswell-E, and the now dwarf size CPU on the right is the Haswell 4770k..
The Rampage V Extreme
The motherboard in which we will be testing the 5960X is the latest Rampage V Extreme board from Asus. The Rampage IV Extreme launched along side the previous X79 chipset and two generations behind Sandy Bridge-E processors. The Rampage Extreme series is reserved for the Enthusiasts platforms from Intel and the launch of Haswell-E brings us the Rampage V Extreme ROG X99 Motherboard. We have a separate review for the Rampage V Extreme, which does include the same tests, but gives a more detailed breakdown of it’s specs/features and altogether what it offers as a motherboard. Here, we are just going to take a standard look at the specs and move onto test setup and configuration
ASUS ROG Rampage V Extreme |
|
| Processor/CPU socket | LGA 2011-v3 socket for new Intel® Core™ i7 processors |
| Chipset | Intel X99 Express |
| Memory | Quad-channel memory architecture; 8 x DIMMs, up to a maximum of 64GB, DDR4 3300MHz (OC)Intel Extreme Memory Profile (XMP) supported |
| Expansion slots | 4 x PCIe 3.0/2.0 x16 slots (supports x16, x16/x16, x16/x8/x8 or x16/x8/x8/x8 mode with 40-lane CPU; x16, x16/x8, x8/x8/x8 mode with 28-lane CPU)1 x PCIe 2.0 x16 slot (maximum x4 mode)1 x PCIe 2.0 x1 slot |
| Multi-GPU support | 4-way, 3-way and 2-way NVIDIA® SLI™ and AMD® CrossFireX™ |
| Storage | 2 x SATA Express ports8 x SATA 6Gbit/s ports1 x M.2 Socket 3 with M Key, type 2260/2280/22110 storage devices supported (PCI Express SSDs only) |
| Networking/LAN | Intel® I218-V Gigabit LAN with GameFirst III and ASUS LANGuard |
| USB | 14 x USB 3.0 ports (10 on back panel, 4 mid-board)6 x USB 2.0 ports (2 on back panel, 4 mid-board) |
| Audio | ROG SupremeFX 2014 8-channel high-definition audio- SupremeFX shielding technology- ELNA® premium audio capacitors- Jack-detection, multi-streaming, front-panel mic jack-retasking- Optical S/PDIF out port at back panelSonic SoundStage / Sonic SenseAmp / Sonic Studio / Sonic Radar II /DTS Connect |
| Dimensions / form factor | EATX, 12-inch x 10.7-inch (30.5cm x 27.2cm) |
Test Setup and Overclocking
Test Setup
Corsiar H105
Intel Core I7 5960x CPU
Asus Rampage V Extreme
Corsair Vengeance 2,666Mhz DDR4 RAM
Kingston HyperX SSD
MSI R9 290X Gaming Edition
Corsair AX1200
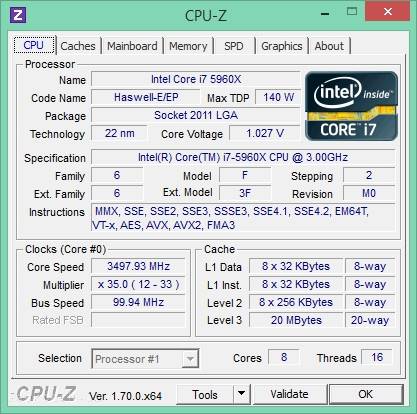
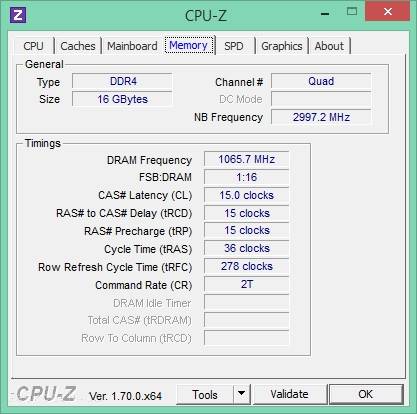
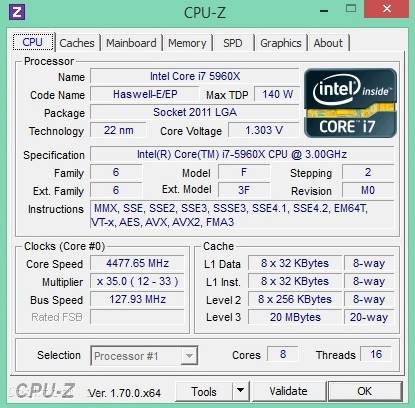
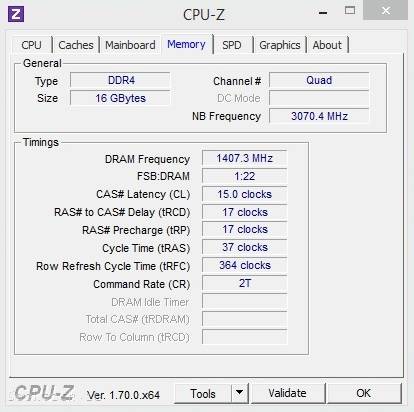
Above is what we will be working with for our review. Our stock results will be without touching the bios settings, so RAM will also be running at just 2,133MHz. Since our RAM is rated at 2,666MHz, Turning on XMP profile will change the base clock from 100MHz to 125MHz. So altogether we will have three different results to go through. Stock/Auto, XMP/Auto, and Overclocked. We have included CPU-Z screenshots below for each setting.
Stock/Auto: 3.5GHz/2,133MHz
Our Stock settings are simply a matter of connecting everything up, picking a boot drive and that’s it. We say Stock/Auto, as with different boards, you may see different results with leaving everything to the board to decide. That being said, most things should be nearly identical. The RAM has an SPD of 2,133MHZ, so that’s exactly what are seeing here.
XMP/Auto: 3.5GHz/2,666MHz
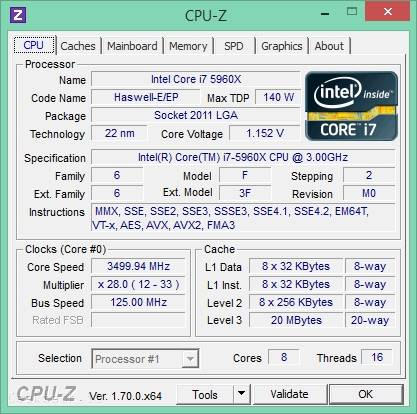
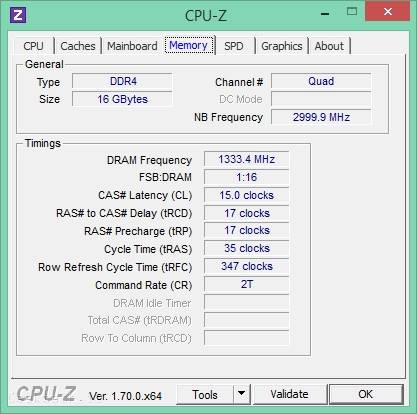
Things are somewhat different with Haswell-E and DDR4 (besides the obvious) XMP will not longer just affect RAM speeds when using 2,666MHz+ modules – Selecting XMP for 2,666MHz or above you will notice the base clock will change from the standard 100MHz to 125MHz and the multiplier dropping from 35 to 28. This is the only way any board can get the RAM to run at that speed.
Overclocked: 4.5GHz/2,817MHz
Overclocking on Haswell-E, while different, is still very much the same. We are obviously not expecting the same clock speeds on the 5960x as we did with regular Haswell, but considering we are dealing with double the cores/threads. We were pleasantly surprised that 4.5GHz (or 4477MHz to be exact) was relatively an easy overclock. Our Vcore was set to 1.30v and base clock at 128MHz with a multiplier of 35. This gave us the 4.48GHz overclock.
The Corsair 2,666MHz RAM had a nice easy XMP profile for 2,800MHz@1.35v, but with our slightly increased baseclock (125MHz-to-128MHz), that was pushed slightly to 2,814MHz. Not much over the 2,800MHz, but a nice increase over the stock 2,666MHz
settings. Now it’s time to move onto the testing and checking out the performance numbers.
2. Test Setup and Overclocking
